
1/9
Model Overview & Print Notes
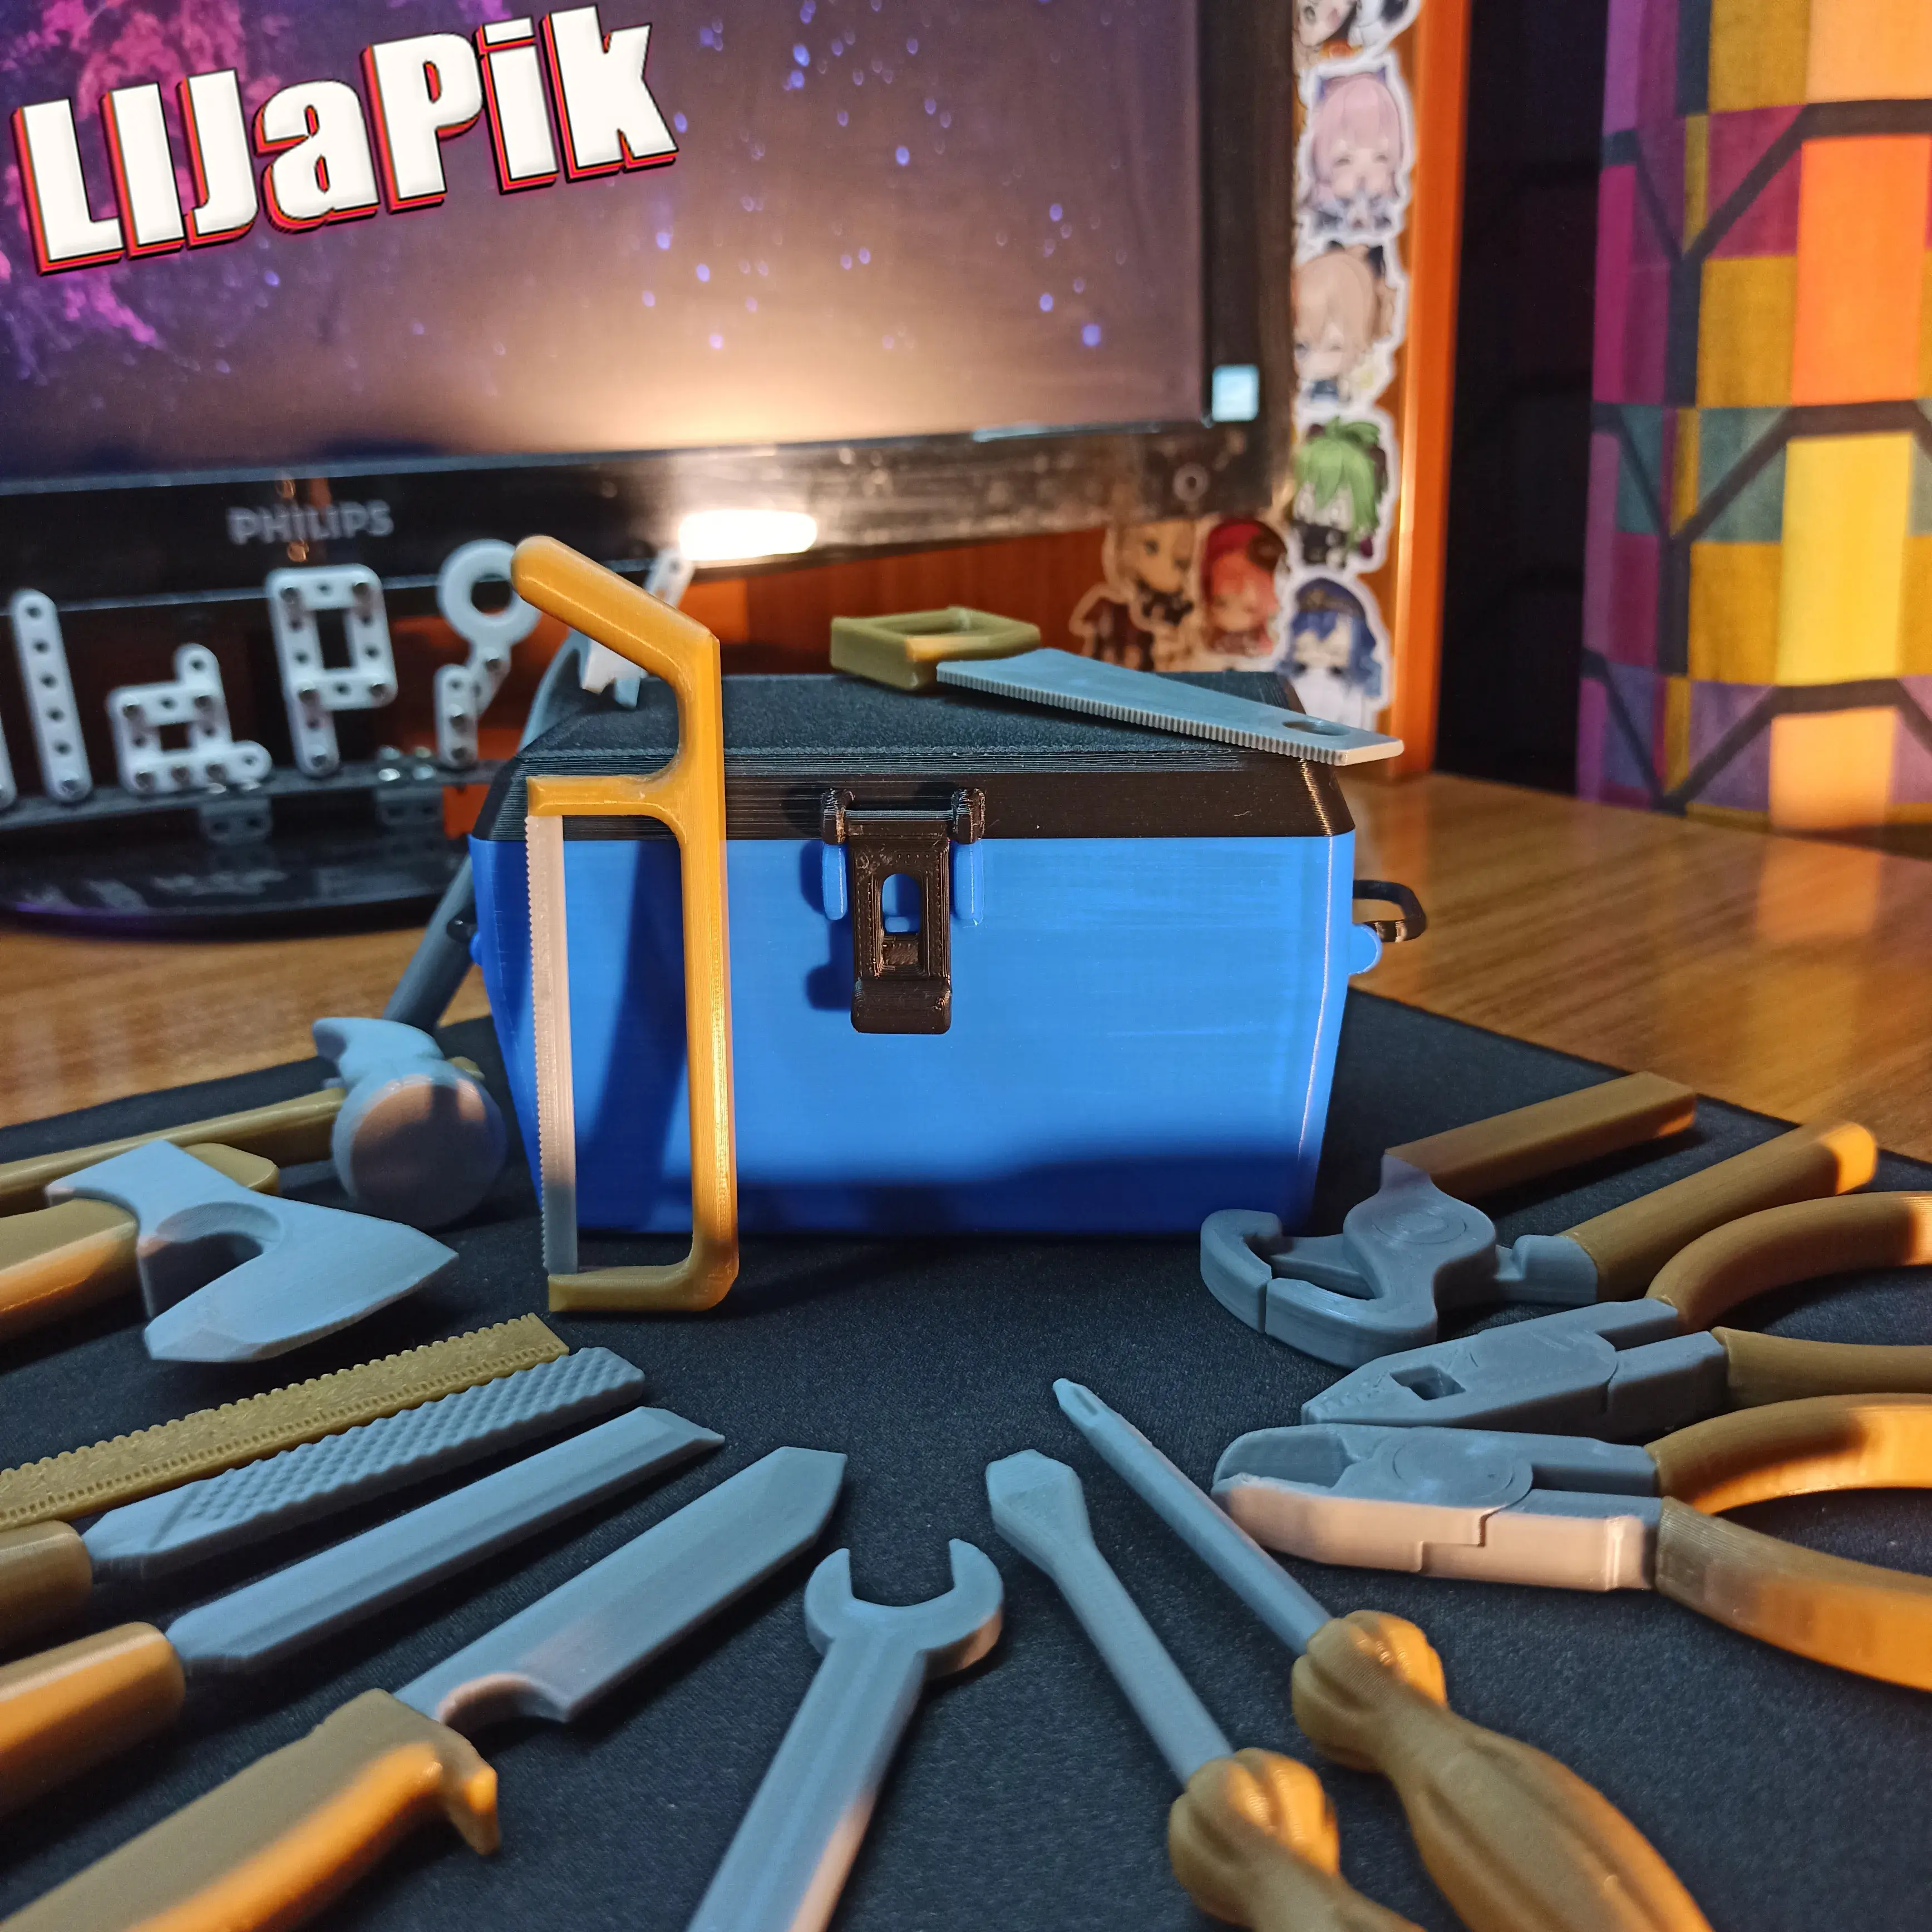
A set of 15 different toy tools along with a storage case.
All tools are designed to look as much like their real-life counterparts as possible.
The approximate length of the tools is 100mm.
The approximate dimensions of the case are W – 85mm, L – 125mm, H – 70mm.
Assembly:
All parts are designed so that no fitting is required during assembly. The assembly process is as simple as possible: remove the supports and deburr or chamfer edges after printing if necessary.
1. All tools are numbered in their names; the assembly is logical and simple—just glue them together and you're done.
2. To assemble the tongs, pincers, and pliers, you need to insert the main parts into each other, then put a drop of glue in the center of the cap that holds these parts together, and insert it. The key is to use just a little glue so that the cap only bonds to the bottom part. This will keep the tools functional.
Printing Tips:
1. All parts are saved in the correct orientation for printing.
2. Nozzle: 0.4mm;
3. Layer height: 0.2mm;
4. Set the support angle to 75 degrees. This way, supports will only be generated where needed. (For better understanding, I have added photos showing how and where the supports should be placed. Parts not shown in the photos are printed without supports);
5. Infill: 20-100%;
6. Smoothing (optional).
7. Number of walls: 4
8. Number of top and bottom layers: 4
Also, make sure the print adheres well to the build plate. I use a thin layer of PVA glue, or simply wipe the surface thoroughly with alcohol. You can also add a "brim" (recommended when printing vertical parts with a small adhesion area); this will improve adhesion and minimize the risk of the part detaching at the edges.
(These tips are more for beginner users)

💬CrealityCloud Community Comments(...)
★CrealityCloud Original Reviews