
1/7

Model Overview & Print Notes
A customizable DIY macro keyboard with RGB backlight and USB C, which uses cherry mx keys.
Features
- RGB backlight
- Fully customizable
- Compatible with all cherry mx keycaps
- USB C
- Simple assembly
- Cover for transport included
- No supports needed
Recommended print settings
- Layer Height: 0.2mm
- No supports needed
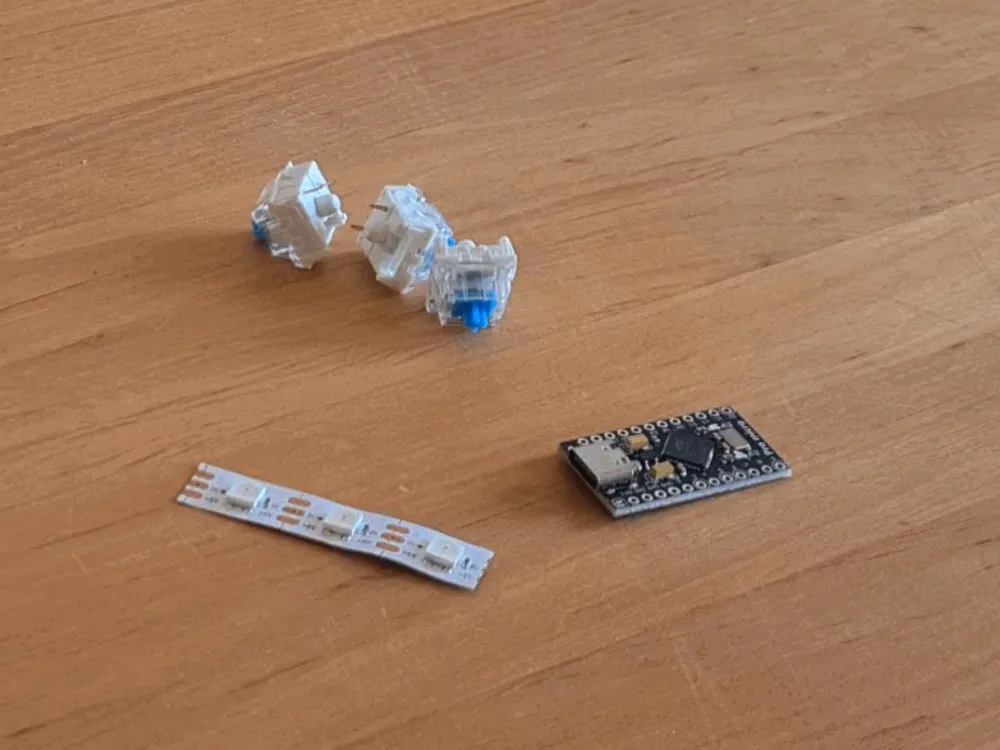
Electronics needed (affiliate links)
- 3 Cherry MX Keys: https://amzn.to/3QNLtqB
- Arduino Pro Micro: https://amzn.to/3SNcPQa
- A piece of a 60 LEDs/m WS2812B strip: https://amzn.to/3G846AA
- 2 M2x8 screws: https://amzn.to/3R4Z5PE
Assembly
YouTube videos (German):
- Part 1/2: https://youtu.be/Fa7JCWy3rmU
- Part 2/2: https://youtu.be/vJzH9g780mw
1. Insert buttons into the case
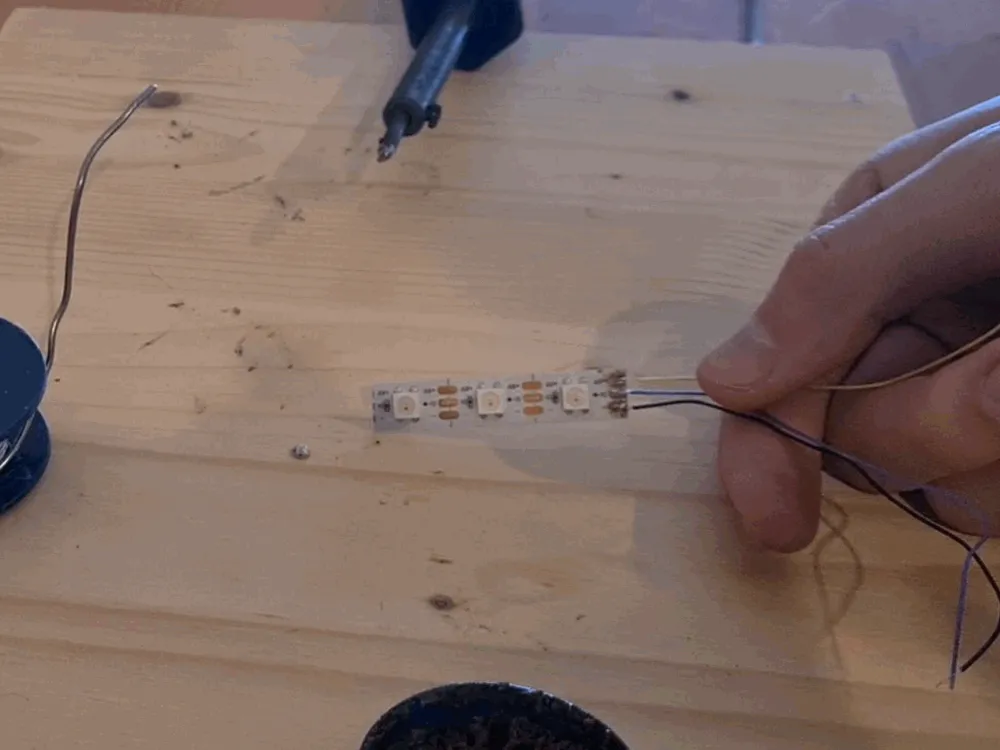
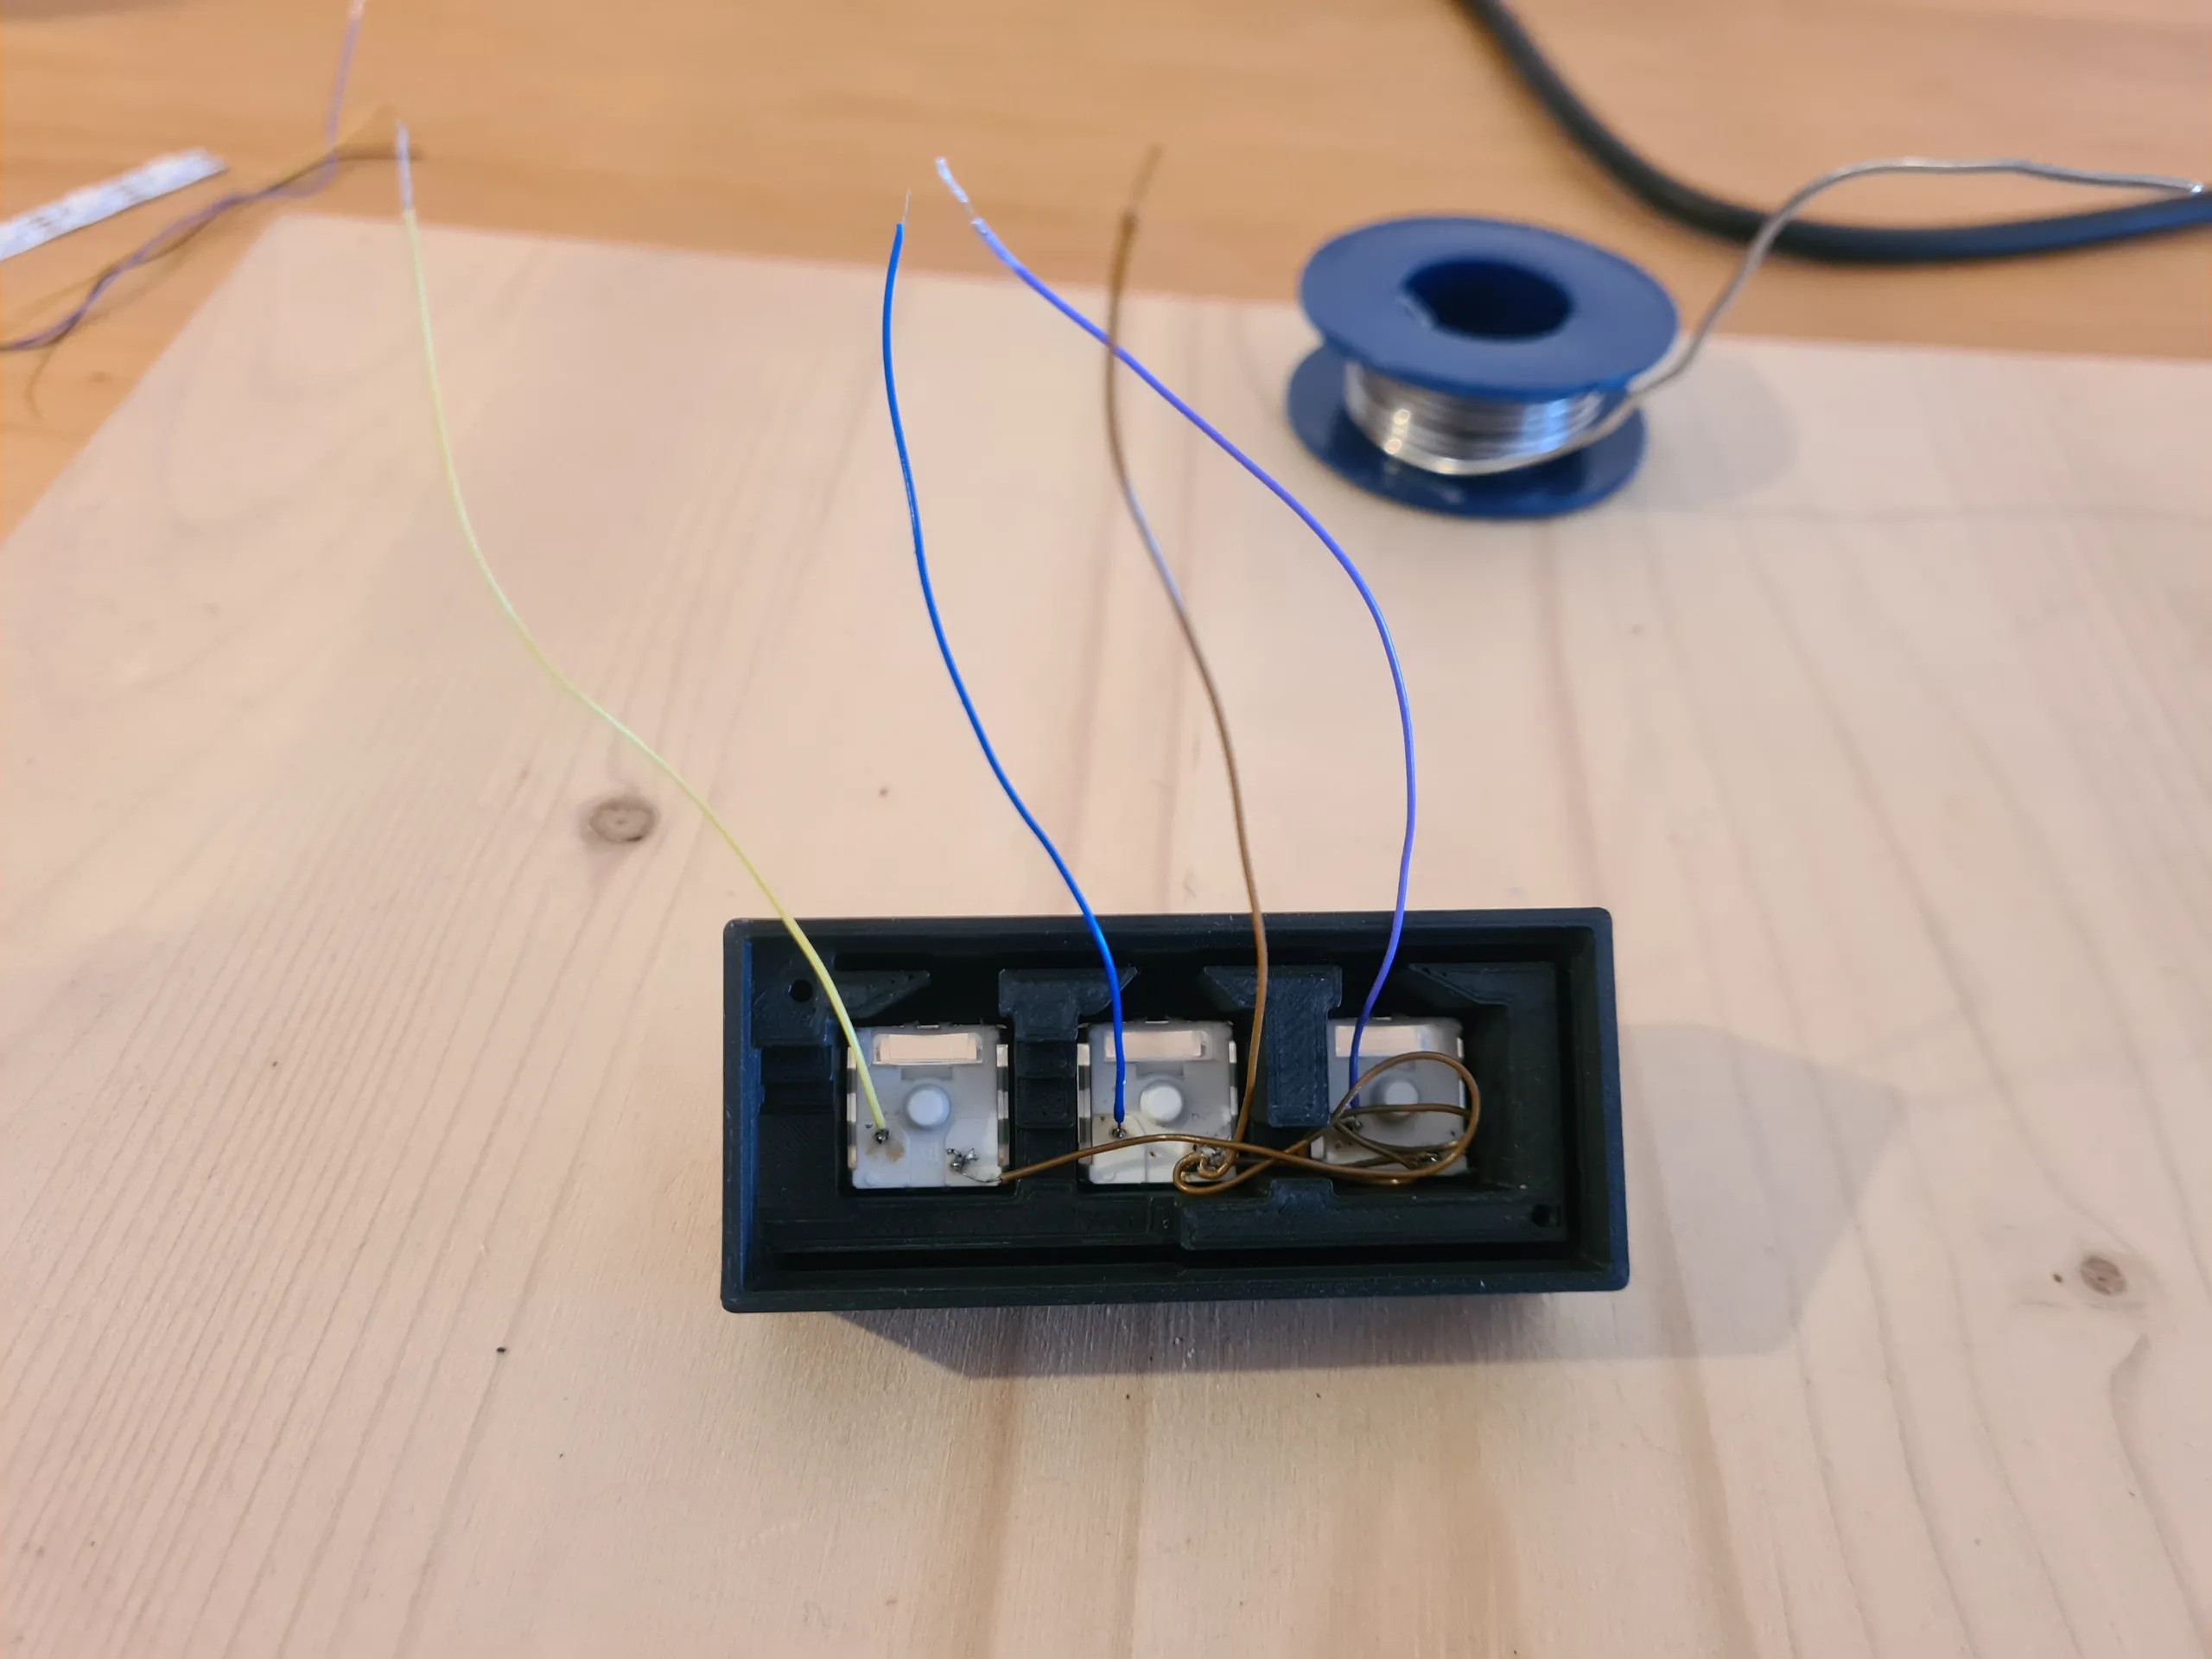
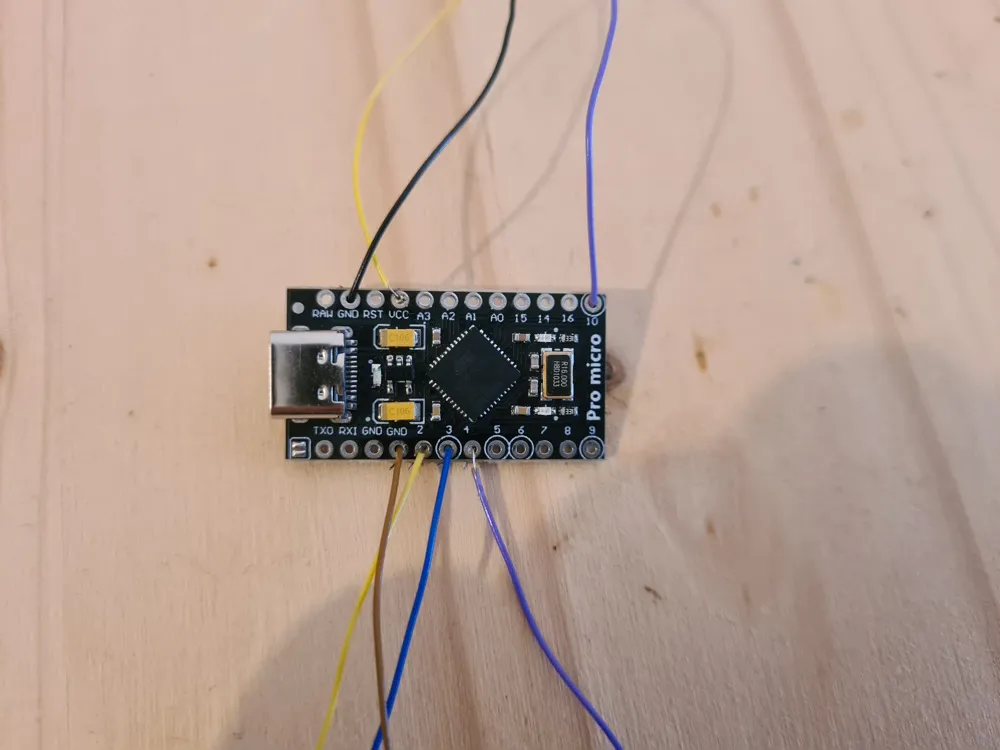
2. Solder the electronics together (images of wiring are at the bottom)
3. Fit the electronics into the case
4. Add the PCB holder print between PCB and lid
5. Screw the lid onto the case
6. Get the Arduino code from GitHub: https://github.com/Molodos/DIYMacroKeyboard
7. Edit the code if you want to customize it
8. Connect the Keyboard to your computer and use the Arduino IDE to upload the code to the Keyboard
9. Add keycaps (use the provided ones, create your own using the plain keycap or the blender source or use any other cherry mx compatible keycaps)
10. Have fun with your new macro keyboard!
Images of the wiring

💬CrealityCloud Community Comments(...)
★CrealityCloud Original Reviews