
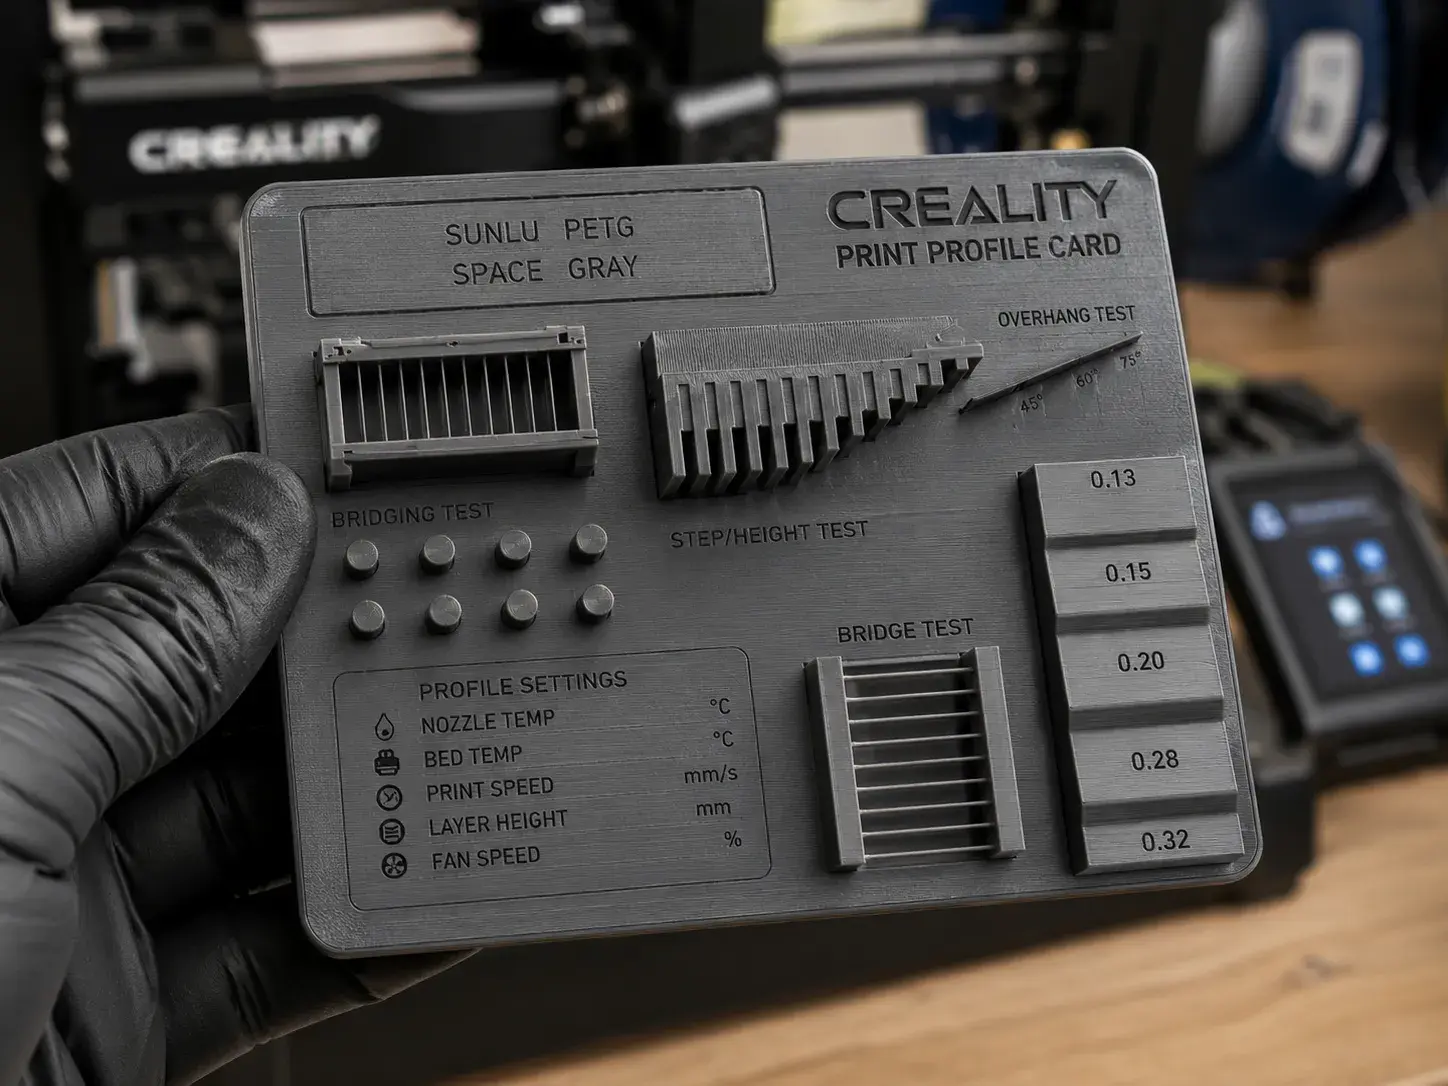
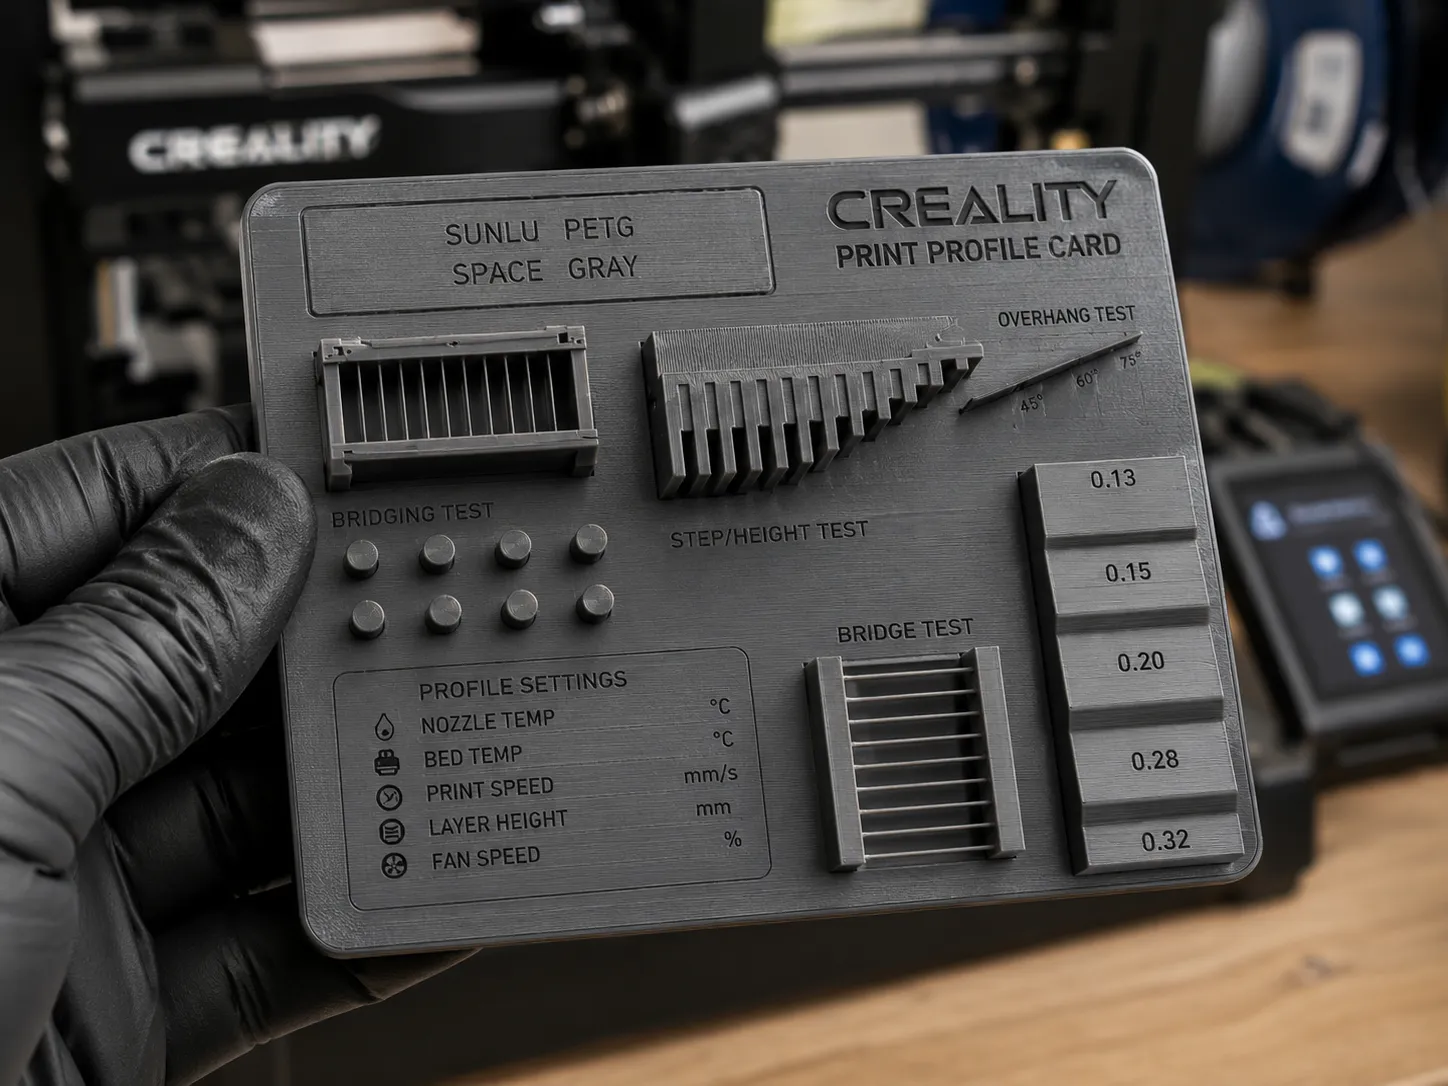
Model Overview & Print Notes
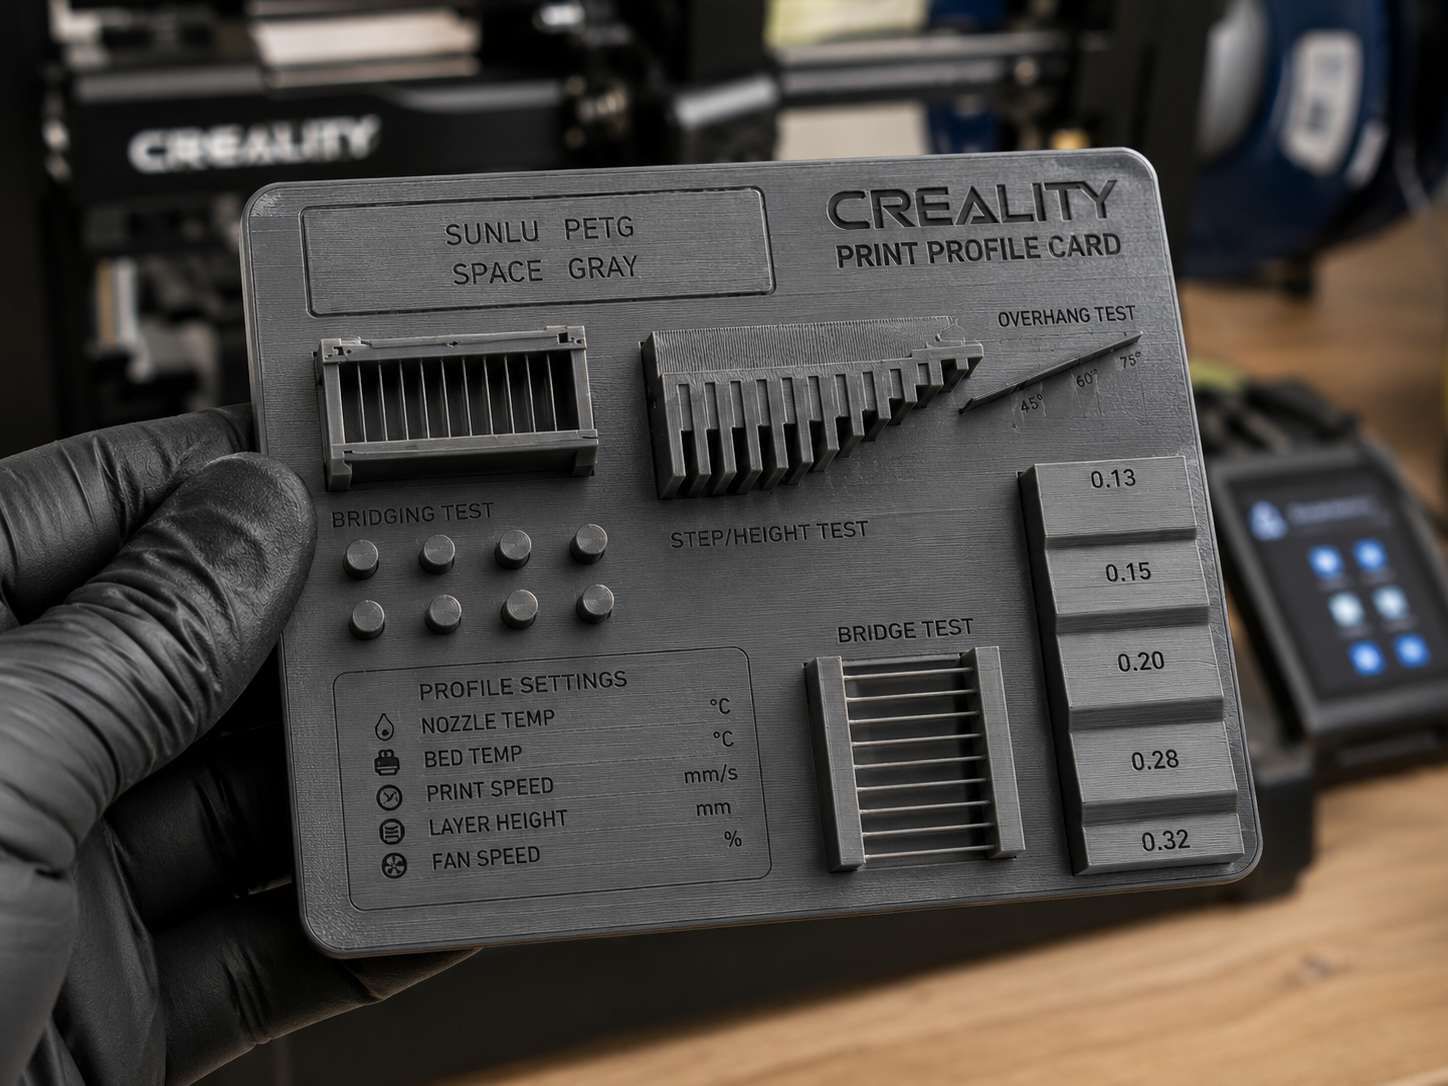
A compact FDM filament test card designed to document your Creality Print profile and evaluate common print issues such as bridging, overhangs, stringing, layer consistency, small details, surface quality and material behavior. Includes a dedicated label area for marking filament brand, material, color and settings.
Creality Print Profile Card – Filament Test, Calibration & Settings Swatch
This Creality Print Profile Card is a compact and practical filament test card designed for makers who want to document, compare and improve their 3D printing profiles. Instead of printing a simple flat color swatch, this card combines a filament identification area with multiple real FDM test features that help reveal common print issues.
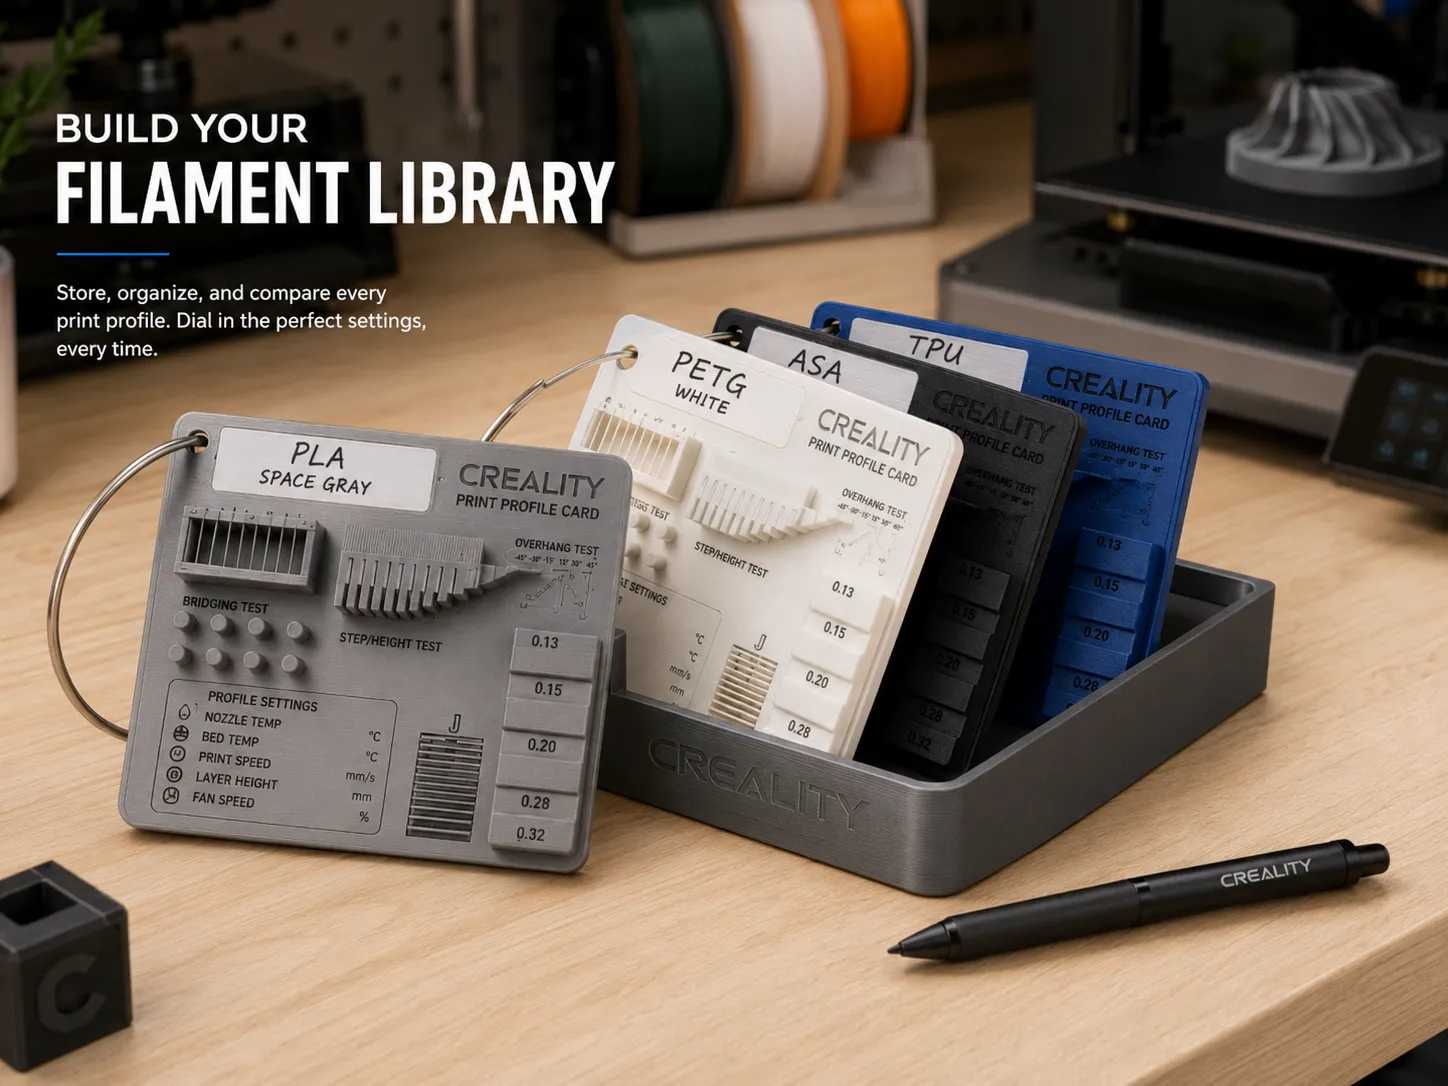
The model is designed to help you evaluate how a filament performs with your current printer, slicer and print profile. It can be used every time you open a new spool of PLA, PETG, ABS, ASA, TPU or other FDM filament. Print one card per filament, write the filament information on the label area, and store the cards as a physical reference library for future projects.
This is especially useful for Creality Print users who want a simple way to compare materials, colors, temperatures, bridging performance, overhang quality, stringing, layer consistency and surface finish.
Approximate model size: 100 × 70 × 7.8 mm
What makes this card different?
Most filament swatches only show color. This card is designed to show much more.
It includes:
- A dedicated label area for filament name, brand, color and settings
- Bridging test section
- Overhang / slope test section
- Small feature and stringing test pins
- Layer height and surface quality zones
- Thin detail and raised feature sections
- Flat base area for first-layer inspection
- Compact card format for easy storage
- Support-free print design
- Useful for Creality Print profiles and general FDM calibration
- The goal is to create a physical record of how each filament actually prints, not just how it looks on the spool.
Key Features
- Compact filament profile card for FDM printers
- Designed for Creality Print users and general slicer profile testing
- Label area for filament name, brand, color, nozzle temperature and bed temperature
- Tests common FDM problems in one small print
- Bridging test to check cooling, speed and material sagging
- Overhang test to evaluate unsupported angled surfaces
- Stringing test pins to reveal retraction and temperature issues
- Step features to check layer consistency and small height changes
- Flat surface area to inspect first-layer quality and top surface finish
- Works as a physical filament library / swatch system
- Easy to print without supports
- Useful for PLA, PETG, ABS, ASA, TPU and other FDM materials
1. Label Area – Filament Documentation
The raised label area is designed for writing or applying a small label with:
Filament brand
Material type
Color name
Nozzle temperature
Bed temperature
Print speed
Cooling setting
Date printed
Printer used
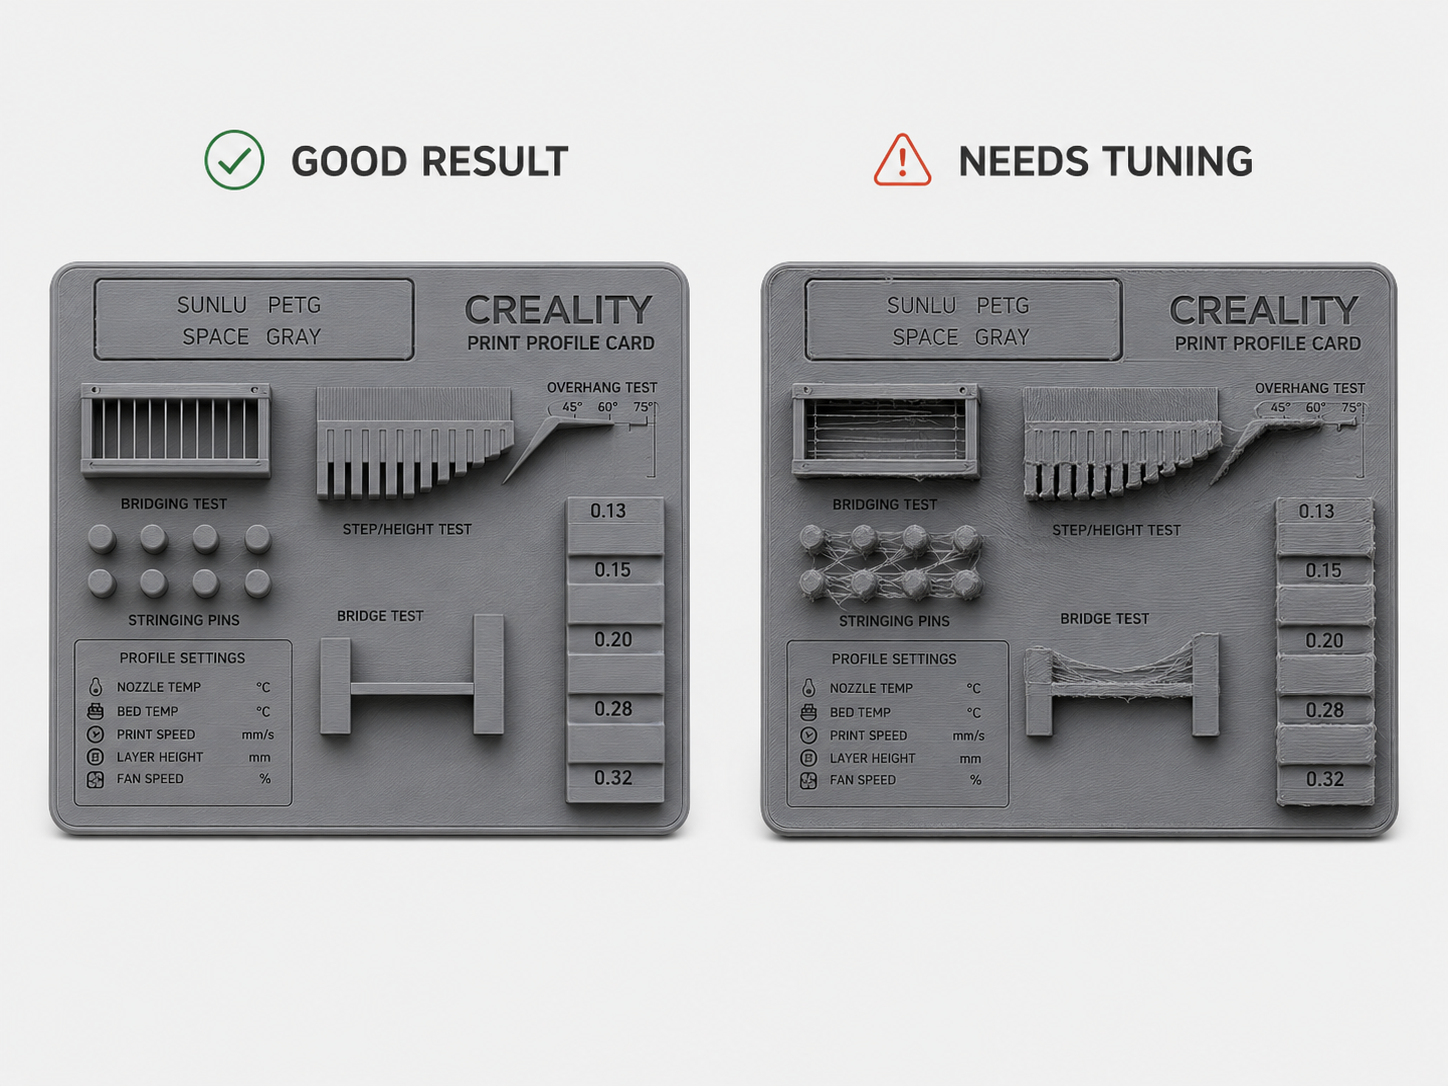
Good result:
The label area should be flat, clean and easy to write on or label.
Bad result:
If the surface is rough, uneven, over-extruded or has gaps, your first layer, flow rate or top surface settings may need adjustment.
2. First Layer & Base Surface
The flat base helps you inspect the first layer and general bed adhesion.
Good result:
The bottom should be smooth, consistent and fully connected, without gaps or rough ridges.
Bad result:
Visible gaps, elephant foot, rough edges or lifting corners may indicate incorrect Z-offset, poor bed adhesion, wrong bed temperature or excessive first-layer flow.
3. Bridging Test
The bridge section tests how well your filament can span a gap without support.
Good result:
The bridge should be mostly straight, clean and only slightly sagging.
Bad result:
Heavy sagging, loose strands or drooping lines may indicate too high temperature, too little cooling, too low bridge speed or poor filament drying.
Possible fixes:
- Lower nozzle temperature slightly
- Increase cooling
- Reduce bridge flow
- Tune bridge speed
- Dry the filament if moisture is suspected
4. Overhang / Slope Test
The angled wedge tests how the filament handles unsupported sloped geometry.
Good result:
The slope should look clean with consistent layers and minimal curling.
Bad result:
Curling, rough underside, drooping edges or melted-looking layers may indicate too much heat, insufficient cooling or printing too fast.
Possible fixes:
Increase part cooling
Lower nozzle temperature
Slow down outer walls
Improve minimum layer time
Use supports for extreme overhangs in real models
5. Stringing Test Pins
The small vertical pins are designed to reveal stringing between travel moves.
Good result:
The pins should be clean with little or no thin hair-like strings between them.
Bad result:
Visible strings, blobs or wispy hairs usually indicate retraction, temperature or moisture problems.
Possible fixes:
- Lower nozzle temperature
- Increase retraction distance or speed carefully
- Dry the filament
- Increase travel speed
- Enable wipe/coast settings if available in your slicer
6. Small Detail / Fine Feature Test
The small raised details and thin structures help evaluate precision.
Good result:
Small features should be clearly shaped and not fused together.
Bad result:
Blobs, rounded corners, merged details or missing features may indicate poor cooling, over-extrusion, too high temperature or an overly large layer height.
Possible fixes:
- Reduce flow slightly
- Lower temperature
- Use slower outer wall speed
- Use 0.20 mm or lower layer height for fine detail
- Check pressure advance / flow calibration if supported
7. Layer Consistency
The card includes surfaces and height transitions that make inconsistent extrusion easier to see.
Good result:
Layer lines should be even and consistent across the card.
Bad result:
Random lines, banding, under-extrusion, blobs or rough sections may indicate inconsistent extrusion, wet filament, unstable temperature, poor spool feed or mechanical issues.
Possible fixes:
- Dry filament
- Check extruder tension
- Check spool path
- Calibrate flow
- Check belt tension and mechanical stability
- Use a more stable temperature profile
Recommended Print Settings
Printer type: FDM / FFF
Nozzle: 0.4 mm recommended
Layer height: 0.20 mm recommended
Walls / perimeters: 2–3
Top/bottom layers: 4–5
Infill: 10–20%
Supports: No
Brim: Not required, optional if adhesion is weak
Print orientation: Flat on the build plate
Material: PLA, PETG, ABS, ASA, TPU or other FDM filament
Cooling: Use your normal filament profile
Purpose: Print with the exact profile you want to test
Important:
Do not over-optimize this model separately. The point is to print the card with the same profile you want to evaluate. If you change too many settings just for the card, it becomes less useful as a comparison tool.
Recommended Testing Method
- Load the filament you want to test.
- Select the Creality Print profile you want to evaluate.
- Do not add supports.
- Print the card flat on the bed.
- Let the part cool before removing it.
- Write or label the filament information on the label area.
- Inspect each test zone.
- Store the card as a physical reference.
- Compare it with future cards printed from other filaments or settings.
Suggested Label Format
You can write this directly on the label area:
Brand:
Material:
Color:
Nozzle:
Bed:
Speed:
Cooling:
Printer:
Date:
Example:
Brand: SUNLU
Material: PETG
Color: Lemon Yellow
Nozzle: 235 °C
Bed: 80 °C
Speed: 60 mm/s
Cooling: 40%
Printer: Ender 3 V3 KE
Date: 2026-05-17
Practical Use Cases
This model is useful for:
- Testing new filament spools
- Comparing PLA vs PETG vs ABS/ASA
- Building a physical filament reference library
- Checking color and surface finish before a large print
- Evaluating Creality Print profiles
- Testing bridging and overhang performance
- Detecting stringing and retraction issues
- Checking if filament is wet
- Comparing nozzle temperatures
- Creating a consistent documentation system for your workshop
- Helping new users understand what their slicer settings actually do
Why you should print one for every filament
Filaments can look very different after printing compared to how they look on the spool. Different brands, colors and materials can also behave differently even with the same slicer settings.
By printing one profile card per filament, you get a physical record of:
Real printed color
Surface quality
Bridging behavior
Overhang performance
Stringing tendency
Detail quality
Temperature/profile performance
General material feel
This makes it much easier to choose the right filament for future functional parts, decorative prints, tool holders, brackets, organizers and workshop accessories.
Quality Guide – Quick Result Checklist
Use this quick checklist after printing:
Excellent profile:
Clean first layer, flat label area, minimal stringing, clean bridge, smooth overhang, sharp small details and even layers.
Acceptable profile:
Minor stringing, slight bridge sagging and small surface imperfections, but the card is still functional and consistent.
Needs tuning:
Heavy stringing, sagging bridge, curled overhangs, blobs, rough surfaces, gaps, weak layer adhesion or warped corners.
Possible wet filament signs:
Popping sounds, rough surface, bubbles, heavy stringing, weak layers or inconsistent extrusion.


💬CrealityCloud Community Comments(...)
★CrealityCloud Original Reviews