
Model Overview & Print Notes
AI Usage Monitor – Claude & Codex Desktop Display
A little DIY project that started with a simple idea... and somehow turned into something much bigger! 😄
How it all started
As a software developer, I regularly use Claude Code and OpenAI Codex for my projects.
If you use these AI tools frequently, you probably know the situation: You're working on something interesting, and suddenly you're wondering how much of your usage limit is actually left.
Sure, you can check your usage statistics on your computer.
But I wanted something different.
What if I had a small display on my desk that always showed my remaining Claude and Codex usage at a glance?
I happened to have a Waveshare ESP32-S3 with a beautiful 1.43-inch round AMOLED display lying around.
And that's where the adventure began. 😁
Home Assistant as the Brain
I'm already using Home Assistant for my smart home, so I wanted to reuse my existing infrastructure instead of running another monitoring service on my Windows PC.
The idea was simple:
Home Assistant collects the usage information, and the ESP32 displays it.
Using suitable Home Assistant integrations, the usage data for Claude and Codex can be retrieved and transmitted to the ESP32 via MQTT.
This means the display itself doesn't need to store any Claude or OpenAI credentials.
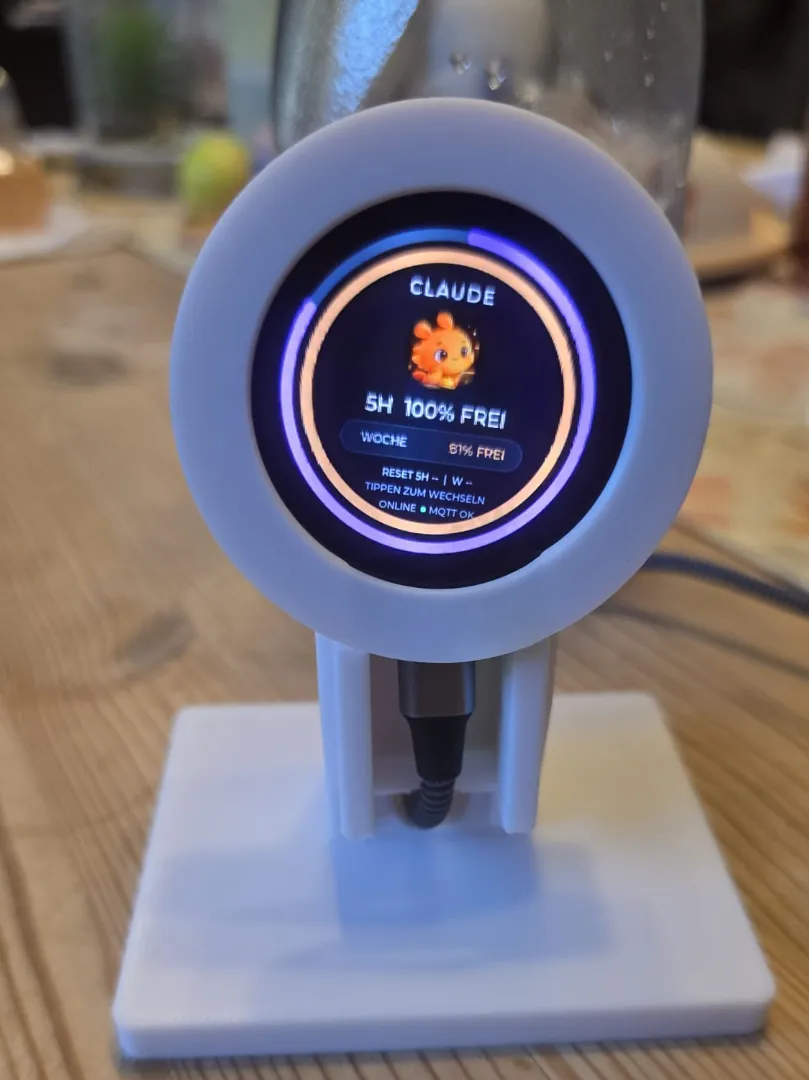
The dashboard shows:
- Remaining usage within the 5-hour window
- Remaining weekly usage
- Two colorful progress gauges
- Usage reset times, when provided by the data source
- Wi-Fi and MQTT connection status
- Separate screens for Claude and Codex
Everything updates automatically through Home Assistant.
Then Things Got a Little Out of Hand...
The first version was pretty basic: just percentages and a few progress rings.
But with a 466 × 466 AMOLED display, I felt it deserved something better.
So I started redesigning the interface.
First came the colorful gauges, then a cleaner layout, and eventually two little animated mascots:
Claude – a cute orange coding companion.
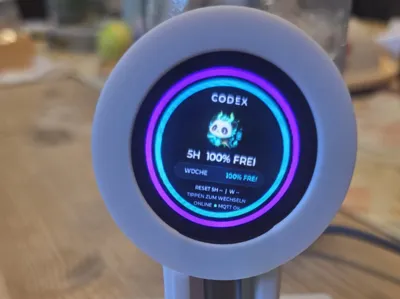
Codex – Jadebyte, a small panda-dragon-inspired character.
Both characters have subtle animations that bring the display to life without hiding the important usage information.
The gauges remain the main focus, so you can immediately see how much capacity you have left.
Wait... It Can Rotate Too?
Yes! 😁
The Waveshare board includes a QMI8658 motion sensor with an accelerometer and gyroscope.
At some point, I had another idea:
What if the entire interface smoothly rotated when I physically turned the display?
Not just switching between 0°, 90°, 180°, and 270°.
I wanted the interface to follow the movement continuously.
So I implemented a motion-based rotation system combining gyroscope and accelerometer readings.
That turned out to be one of the biggest technical challenges.
Rendering and rotating a full 466 × 466 image on an ESP32-S3 is surprisingly demanding!
After several rounds of optimization, the display now follows the device orientation smoothly enough to make the effect genuinely fun to use.
Building the Enclosure
Of course, a bare development board sitting on my desk wasn't exactly the finished product I had in mind.
So I designed a custom enclosure using OpenSCAD.
And yes... there were quite a few iterations and test prints before everything fitted properly.
The final design includes:
- A circular housing for the Waveshare 1.43-inch AMOLED board
- A slightly tilted desktop stand
- A stable base
- Internal mounting points for the PCB
- A removable front bezel
- A concealed USB-C cable route
- A rear cable channel with a separate cover
- A clean front appearance without visible cables
The board is installed with its USB-C port facing downward.
The cable is routed through the rear of the stand, keeping the front as clean as possible.
The enclosure can be printed in any color you like. I used white for my prototype, but matte black would look fantastic too.
Required Hardware
- Waveshare ESP32-S3 Touch AMOLED 1.43" (466 × 466)
- USB-C cable
- Suitable M2 screws for the PCB
- The 3D-printed enclosure parts
- A 2.4 GHz Wi-Fi network
Display / Hardware:
Get the Waveshare ESP32-S3 AMOLED Display on Amazon
To display live AI usage information, you'll also need Home Assistant with MQTT and compatible usage-monitoring integrations.
The physical display and its firmware can also be adapted to show other information.
Firmware & Source Code
The complete firmware project is available on GitHub:
https://github.com/SBajonczak/ai-usage-monitor-pio
The software is written in C++ using PlatformIO and LVGL 9.
It includes:
- ESP32-S3 display support
- MQTT connectivity
- Claude and Codex usage screens
- Animated mascots
- Smooth gyroscope-based screen rotation
- Performance-optimized graphics rendering
- Configuration options for Wi-Fi, MQTT, and display behavior
Feel free to explore the code and customize the interface for your own projects.
Please note: The files uploaded to MakerWorld contain the printable enclosure. The firmware is available separately on GitHub.
Printing Recommendations
The enclosure can be printed using PLA or PETG.
Suggested settings:
- Layer height: 0.20 mm
- Walls: 3
- Infill: 15–20%
- Material: PLA or PETG
Please check the fit of your board and USB-C connector before final assembly.
Different USB-C cables may have slightly different connector dimensions.
Final Thoughts
What started as a simple idea to monitor my remaining Claude and Codex usage turned into a complete little desktop gadget.
It now combines:
Home Assistant + MQTT + ESP32-S3 + AMOLED + Animated Mascots + Gyroscope + 3D Printing
And the best part?
It actually sits on my desk and works! 😁
I really enjoyed bringing together software development, electronics, smart home automation, and 3D printing in one project.
Hopefully, other developers and makers will find it useful or use it as inspiration for their own creations.
If you build one, I'd love to see your version!
Happy printing and happy coding! 🚀
This is an independent community DIY project and is not officially affiliated with Anthropic, OpenAI, or Waveshare.
Claude and Codex are trademarks of their respective owners.

💬MakerWorld Community Comments(0)
★MakerWorld Original Reviews