

Model Overview & Print Notes
Summary
This is a painting handle capable of holding miniatures with bases of 25mm as well as 32mm in diameter but not limited to this. The handle makes it much easier to hold a miniature during painting. It has 2 different slots for bases of different diameter. There is also a slot on the bottom where you could glue in a 10x1 magnet in order to stick it to some metallic surface (can lids?).
UPDATE 10 May 2018:
Version 3.3.3 uploaded. Many improvements are made to the design. Among them are:
- Caps design is changed and is now less prone to breaks
- Center point of the slot for 25mm bases is shifted so now bases are held much better
- Pins are added to the sides of the handle so it is easier to open
- All parts are oriented correctly so no need to rotate them before printing
Old version of the handle is available here: https://www.dropbox.com/s/ifzvas87bq0xauw/Painting_Handle_V3.1.zip?dl=0
UPDATE 10 March 2018:
- Added 0.2mm chamfer to the handle to prevent formation of 'elephant foot'
UPDATE 5 March 2018:
- gap between Handle and Platform increased from 0.2 to 0.3 mm
- chamfers added to the Cap
Print Settings
Printer Brand:
Prusa
<p class="detail-setting printer"><strong>Printer: </strong> <div><p>i3 MK3</p></div></p> <p class="detail-setting rafts"><strong>Rafts: </strong> <div><p>No</p></div></p> <p class="detail-setting supports"><strong>Supports: </strong> <div><p>No</p></div></p> <p class="detail-setting resolution"><strong>Resolution: </strong> <div><p>0.2</p></div></p> <p class="detail-setting infill"><strong>Infill: </strong> <div><p>20%</p></div></p> <br> <p class="detail-setting notes"><strong>Notes: </strong> </p><div><p>Make sure the Caps are printed solid. For the handle I recommend to print with 3 or more perimeters.</p><h3>Print</h3><ul><li>2x Caps</li><li>2x Platform</li><li>1x Handle</li></ul></div>Post-Printing
To assemble the handle you would need a rubber band and a paper clip.
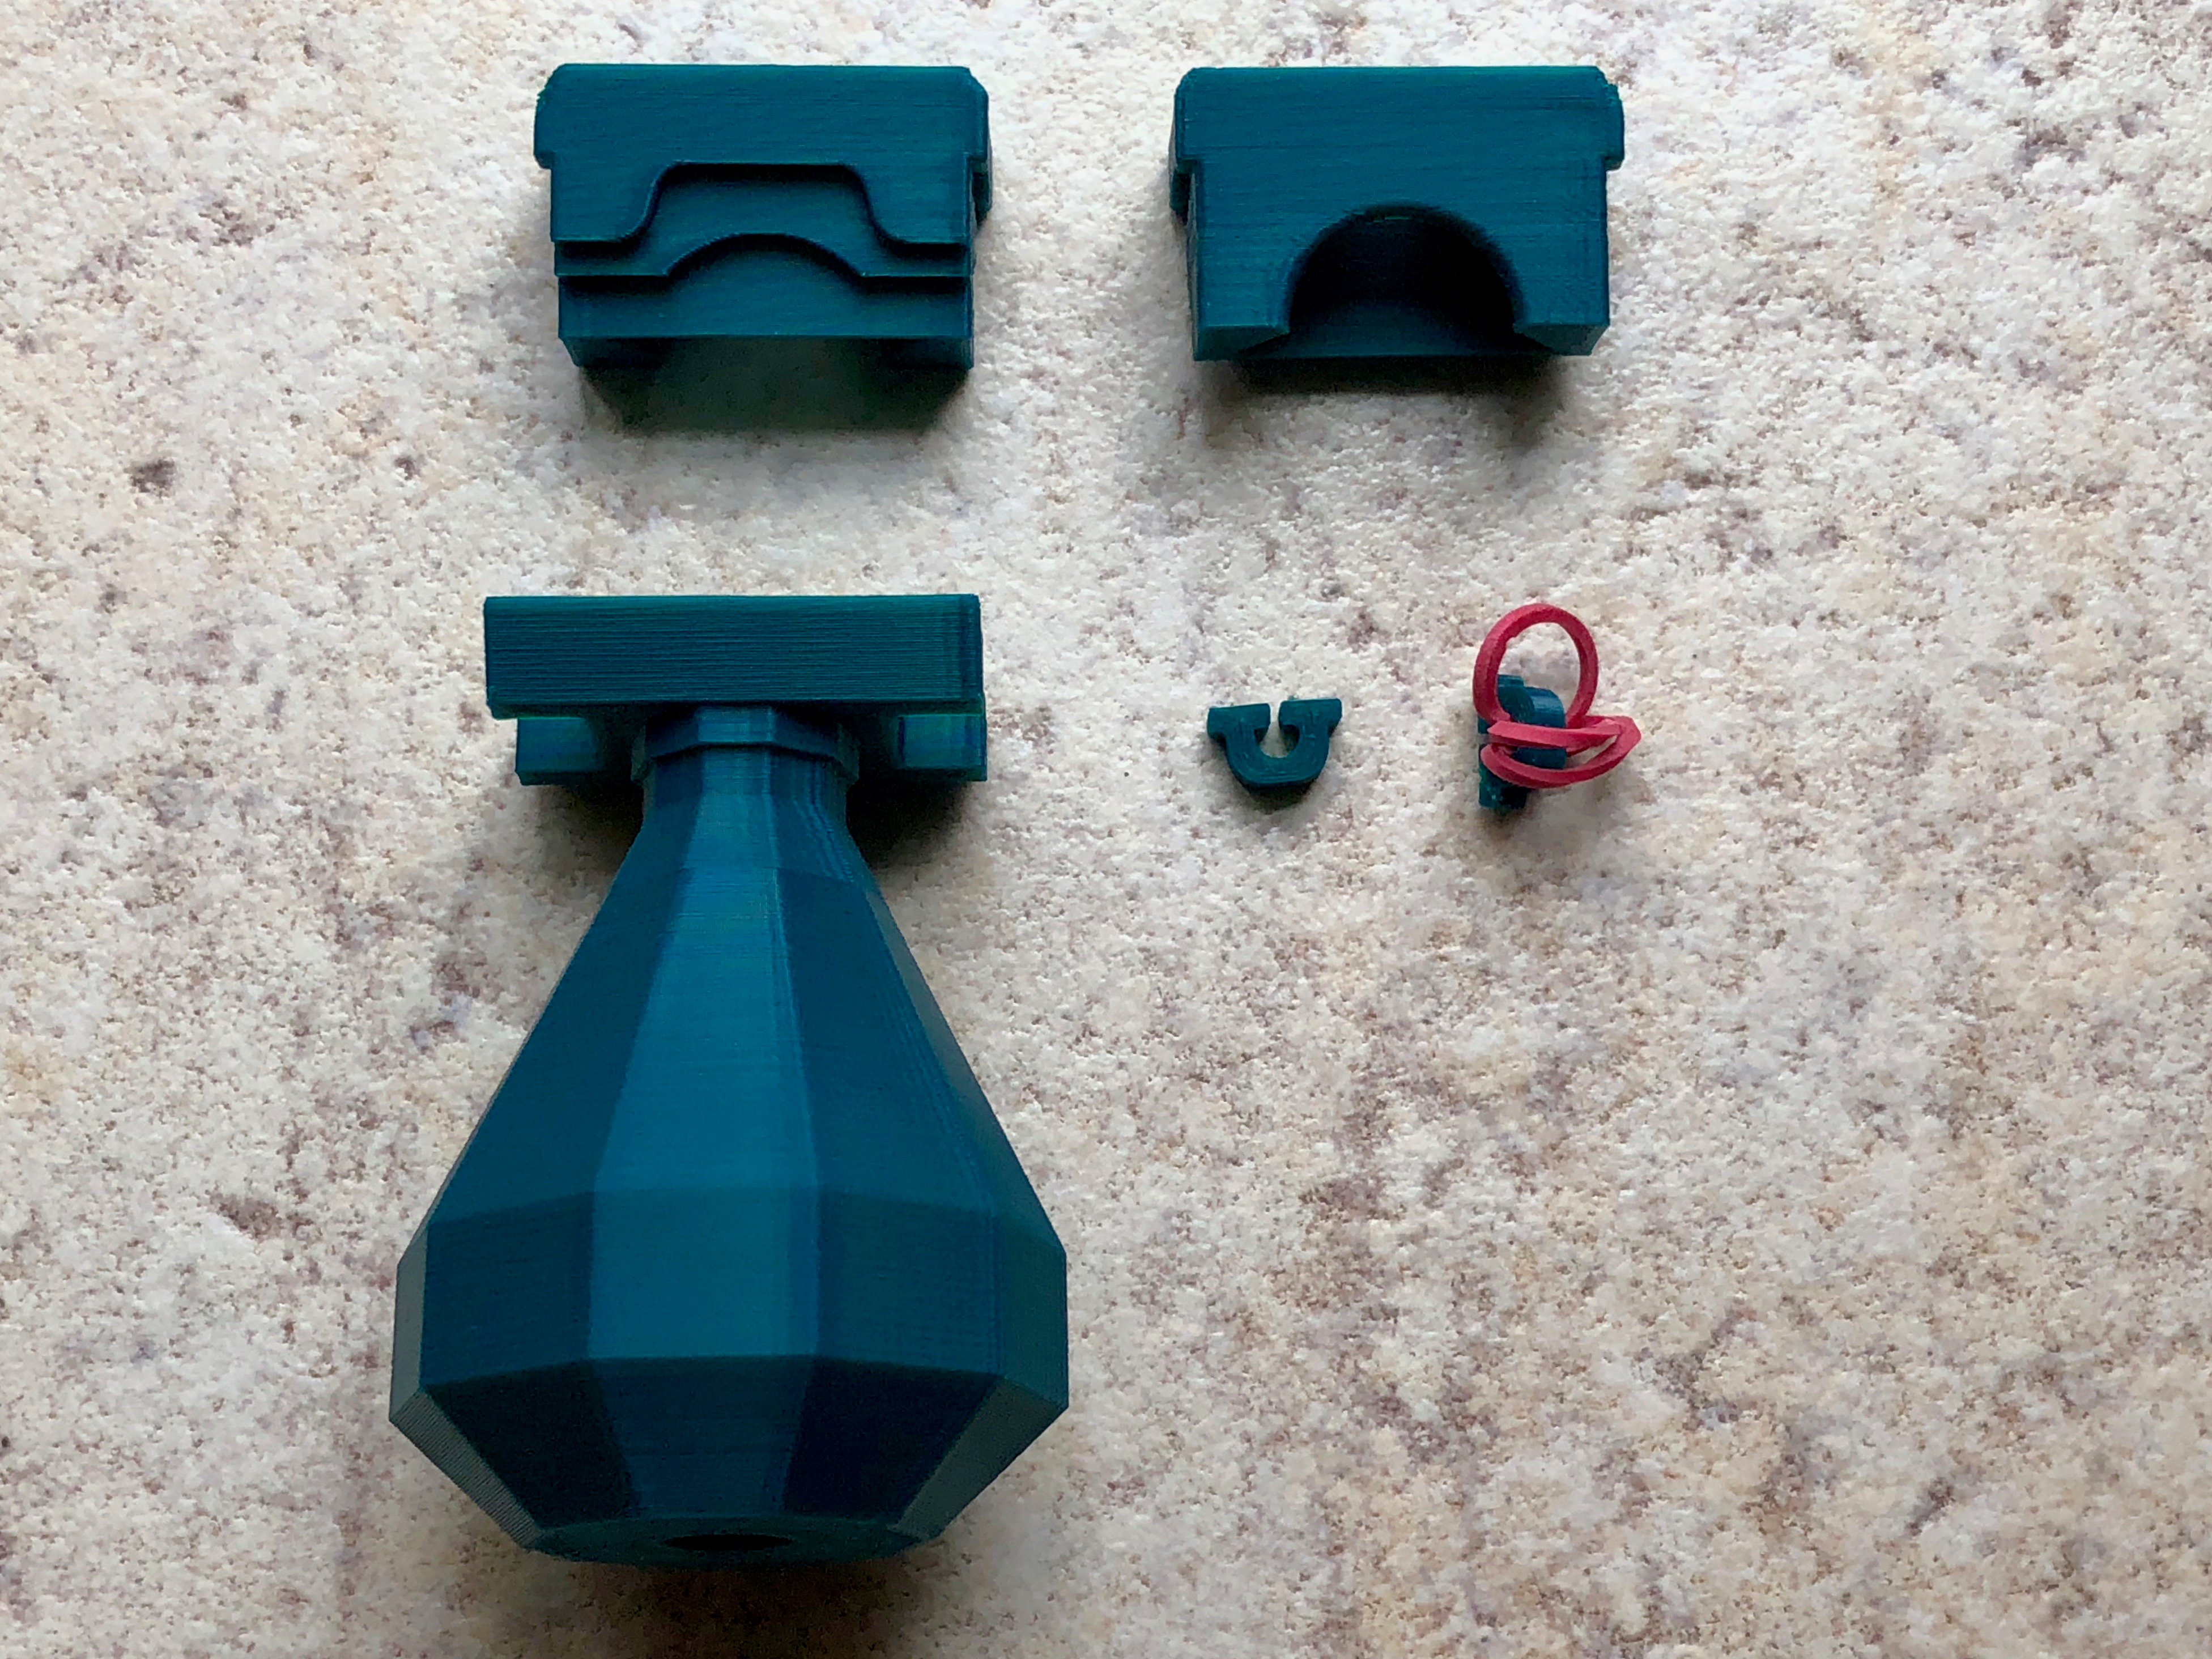
Assembling steps
- make a hook out of paper clip.
- coil rubber band 3 or 4 times (I found 4 coils to work better but a bit harder to assemble)
- seize coiled rubber band with the hook on one cap (see the image above)
- assemble handle and 2 platforms and pass paperclip hook through holes in them (see below)
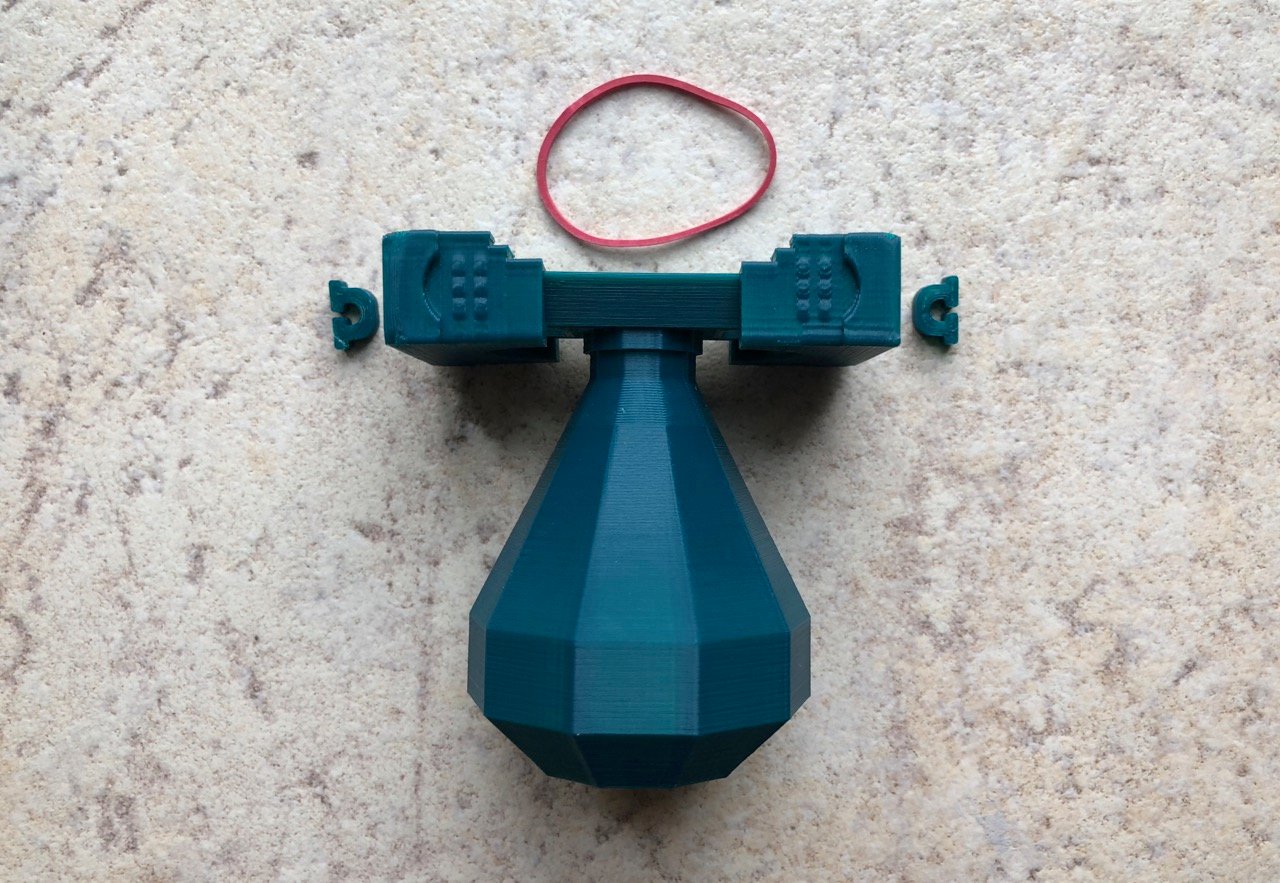
- grab the rubber band with the hook and pull it out from the other side
- use something to fix the rubber band from another side and put the second cap on
Enjoy!

💬Thingiverse Community Comments(48)
★Thingiverse Original Reviews